 Show Posts
1
Other Modifications / Creating models
« on: 16 January 2019, 04:26:24 »
Note - Checking links on own risk, all uploaded on site with name "fast-files". - efko
This is the original text of the tutorials, that I published on www.titanquest.net in 2016.
MSH Tools is the macroscript for the 3dmax to import and export TQ's files of models(.msh) and animations(.anm).
It was created by 3d max 9.0 (Errors may be on low versions)
This script also can work with files of Grim Dawn, but errors may be.
Excuse me for spelling and report about serious mistakes to me, please.
I'll try to tell about all functions of my script by examples.
It still has many errors.
Installation
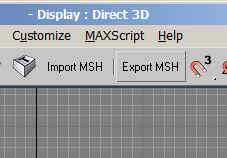
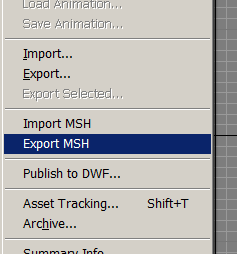
For example, add to the File menu on the Utilities panel.
Import MSH
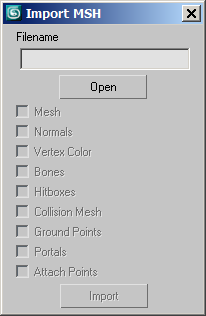
Export MSH - Tutorials
Weapons
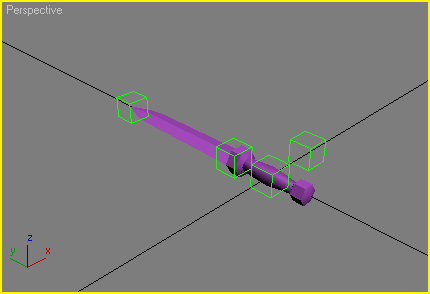
Import some original weapon to the scene.
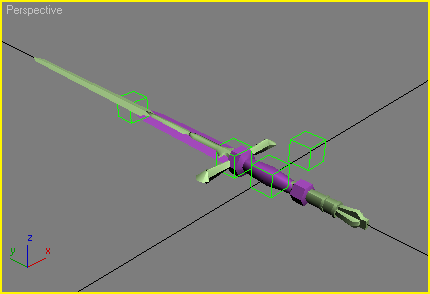
Then import your mesh.
To export it correctly your mesh should be Editable_mesh geometry class and has texture coordinates.
Texture coordinates must be in the first map channel.
Also it's necessary that each vertex of your mesh has one normal.

Align your mesh and set correct scale.
Now you can delete old mesh.
There is the trace of the weapon between "Anchor1" and "Anchor2" attach points .
There is "Anchor1" on the tip of the sword and "Anchor2" on the sword handle.
The others attach points define position temporary effects.
Preparations is finished, now open the Export MSH macros.
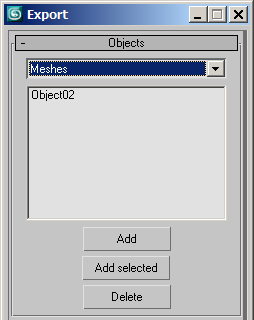
In the first rollout add your mesh.
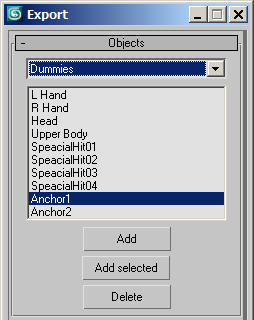
Then choose Dummies (They are Attach Points) in the first drop-down list and add all here.

Below in the Texture rollout add your texture.
You can click the Add button to choose a template to create new texture.
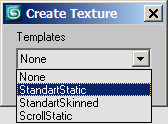
There is the empty template and three often used shader templates there.
But you click the Import button to import the texture list from another file.
There are many shaders and their properties. It's for another article.
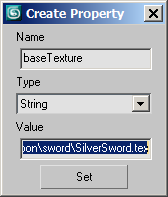
Double click on "baseTexture" and "bumpTexture" in the texture list and set the path to your textures.

Now return to the first rollout and choose Meshes in the drop-down list, then double click on the name of your mesh and set the number of the texture more zero.
It's important because if some mesh has the texture number equal zero then the model will not be displayed.
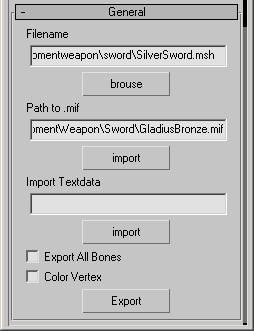
In the last rollout click the Brouse button to select the name of the file to be saved.
.mif is really mythical file format. I didn't find any original file, but in some article it is written that this file include attach points and other text data, which you will set later.
Therefore you can write here what you want or pass it or click button below to import the path to one from the original file.
Textdata include the skeleton geometry and cannot be changed by this macros, therefore it should be imported from the original file, if it's necessary.
But now pass this edit box because the textdata of weapon files include only attach points.
Click on the Export button.
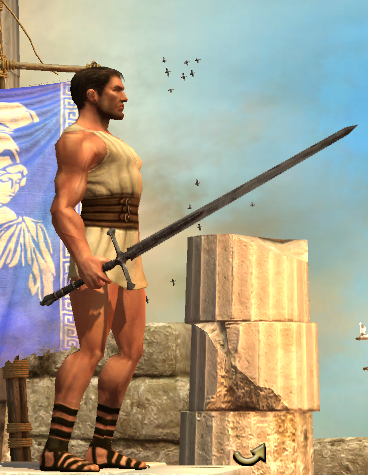
Now can test the model.
Effects
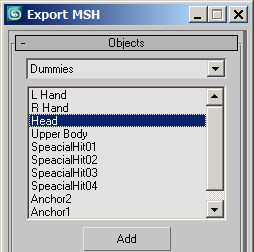
To create an effect choose Dummies in the drop-down list of first rollout and double click on some point of the list.

There is a parent bone in the Parent edit box, if it exists.
Export attach points already have their parent bone and the list of effects from the export file.
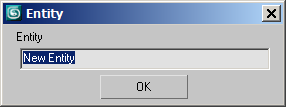
Click the Add button and then double click on the added point of the list.
Write path to some .dbr file in the showed dialog.
One attach point may contain several effects.
You can look effects in Editor.
For example
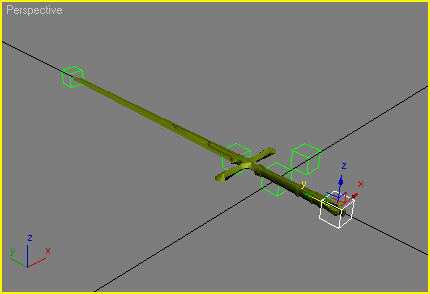
I have created new dummy and moved it at the sword pommel.
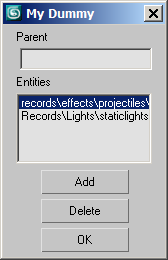
Then I have added two effects:
records\effects\projectiles\343_arrowfrost_flight_fx.dbr
records\Lights\staticlights\10mlight_stat_blue.dbr
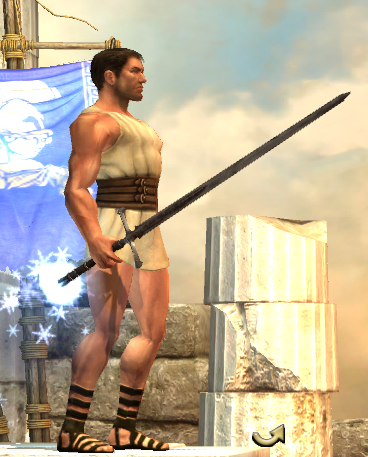
It looks so
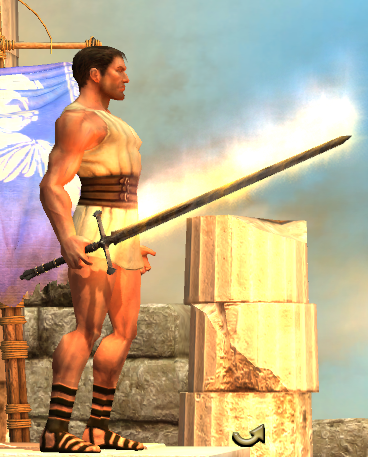
or with my own effect.
The .dbr file can have not only effects but also something other.
Vertex Color
Armors
Decorations
Platforms
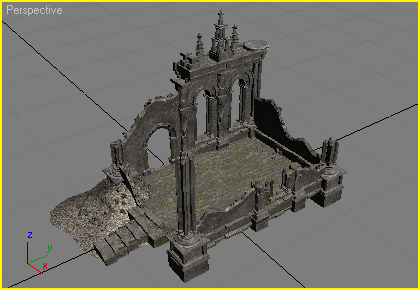
If you create some building then you may need impassable and passable areas of any form.

Create a low poly mesh.
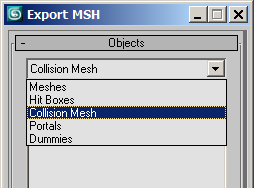
In the first rollout choose Collision Mesh in the drop-down list and add this mesh.
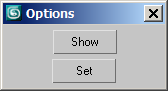
Double click it in the listbox to show its options.
If you added the imported mesh in the list, you can click the Show button to see its passable faces.
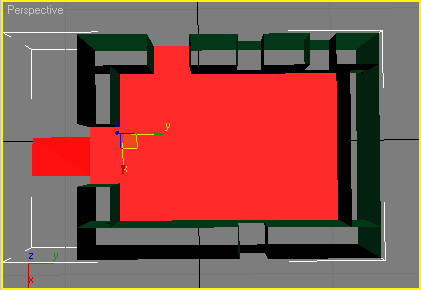
Select your low poly mesh, open the Modify Panel, Faces Sub-Object level and select faces that will be passable, then click the Set button.
You can export.

Ground points
Portals
This is the original text of the tutorials, that I published on www.titanquest.net in 2016.
Spoiler for links:
MSH Tools v1.0.8.3 (19 Jun 2016)
MSH Tools v1.0.8 (15 Jun 2016)
MSH Tools v1.0.6 (12 Aug 2015)
MSH Tools v1.0.5 (23 Feb 2015)
MSH Tools v1.0.4 (18 Feb 2015)
MSH Tools v1.0.3 (14 Feb 2015)
MSH Tools v1.0.2 (26 Oct 2014)
MSH Tools v1.0.1 (23 Oct 2014)
MSH Tools v1.0.0 (13 Oct 2014)
MSH Tools v1.0.8 (15 Jun 2016)
MSH Tools v1.0.6 (12 Aug 2015)
MSH Tools v1.0.5 (23 Feb 2015)
MSH Tools v1.0.4 (18 Feb 2015)
MSH Tools v1.0.3 (14 Feb 2015)
MSH Tools v1.0.2 (26 Oct 2014)
MSH Tools v1.0.1 (23 Oct 2014)
MSH Tools v1.0.0 (13 Oct 2014)
MSH Tools is the macroscript for the 3dmax to import and export TQ's files of models(.msh) and animations(.anm).
It was created by 3d max 9.0 (Errors may be on low versions)
This script also can work with files of Grim Dawn, but errors may be.
Excuse me for spelling and report about serious mistakes to me, please.
I'll try to tell about all functions of my script by examples.
It still has many errors.
Installation
Spoiler for Hiden:
- 1. Download and move the script into the ...\ui\macroscripts directory.
- 2. Then on the Utilities panel, click MAXScripts -> Run Script... and run this script.
- 3. Click the Customize menu and choose Customize User Interface.
- a) to add a button to a toolbar
- 1. Click the Toolbars tab.
- 2. Choose MSH Tools in the Category drop-down list.
- 3. Drag Import MSH and Export MSH from the list to some toolbar.
- b) to add a command to a menu
- 1. Click the Menus tab.
- 2. Choose MSH Tools in the Category drop-down list.
- 3. Drag Import MSH and Export MSH from the list to the right list.
For example, add to the File menu on the Utilities panel.
Import MSH
Spoiler for Hiden:
- 1. Click the Open button.
- 2. Choose necessary a file type in the File Types drop-down list.
- 3. Open the file.
- 4. Select necessary for import to the 3dmax scene (if you will select import an animation, then all checkboxes will be disabled).
- 5. Click the Import button.
Export MSH - Tutorials
Weapons
Spoiler for Hiden:
Import some original weapon to the scene.
Then import your mesh.
To export it correctly your mesh should be Editable_mesh geometry class and has texture coordinates.
Texture coordinates must be in the first map channel.
Also it's necessary that each vertex of your mesh has one normal.
Align your mesh and set correct scale.
Now you can delete old mesh.
There is the trace of the weapon between "Anchor1" and "Anchor2" attach points .
There is "Anchor1" on the tip of the sword and "Anchor2" on the sword handle.
The others attach points define position temporary effects.
Preparations is finished, now open the Export MSH macros.
In the first rollout add your mesh.
Then choose Dummies (They are Attach Points) in the first drop-down list and add all here.
Below in the Texture rollout add your texture.
You can click the Add button to choose a template to create new texture.
There is the empty template and three often used shader templates there.
But you click the Import button to import the texture list from another file.
There are many shaders and their properties. It's for another article.
Double click on "baseTexture" and "bumpTexture" in the texture list and set the path to your textures.
Now return to the first rollout and choose Meshes in the drop-down list, then double click on the name of your mesh and set the number of the texture more zero.
It's important because if some mesh has the texture number equal zero then the model will not be displayed.
In the last rollout click the Brouse button to select the name of the file to be saved.
.mif is really mythical file format. I didn't find any original file, but in some article it is written that this file include attach points and other text data, which you will set later.
Therefore you can write here what you want or pass it or click button below to import the path to one from the original file.
Textdata include the skeleton geometry and cannot be changed by this macros, therefore it should be imported from the original file, if it's necessary.
But now pass this edit box because the textdata of weapon files include only attach points.
Click on the Export button.
Now can test the model.
Spoiler for Hiden:
To create an effect choose Dummies in the drop-down list of first rollout and double click on some point of the list.
There is a parent bone in the Parent edit box, if it exists.
Export attach points already have their parent bone and the list of effects from the export file.
Click the Add button and then double click on the added point of the list.
Write path to some .dbr file in the showed dialog.
One attach point may contain several effects.
You can look effects in Editor.
For example
I have created new dummy and moved it at the sword pommel.
Then I have added two effects:
records\effects\projectiles\343_arrowfrost_flight_fx.dbr
records\Lights\staticlights\10mlight_stat_blue.dbr
It looks so
or with my own effect.
The .dbr file can have not only effects but also something other.
Spoiler for Hiden:
Also the .msh format lets you set vertex color.

After import you may open the VertexPaint modifier to see vertex color
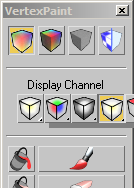
and alpha channel.
Now about export.
Open the VertexPaint modifier.
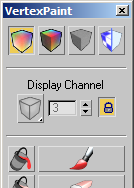
Leave the closed lock not to get confused later.
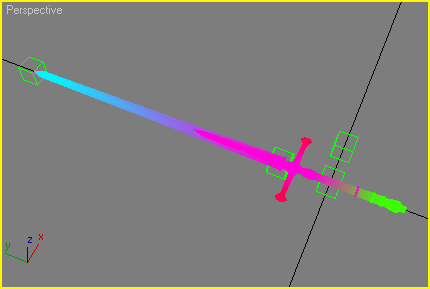
After you painted vertexes in the VertexPaint modifier, open Export MSH.
You must use texture shaders with "vertexcolors" words that vertex color will be displayed.
In this case I use standardvertexcolorstatic.ssh.
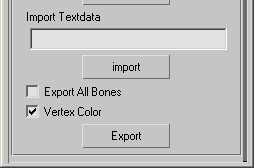
Don't forget to check the Vertex Color checkbox.
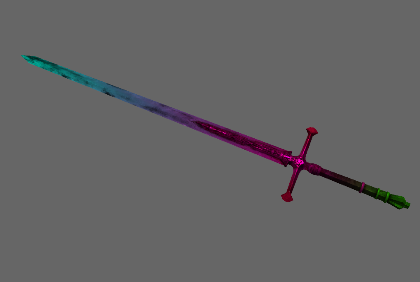
So it looks in Editor.
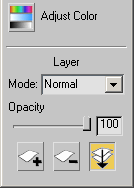
To paint the alpha channel create new channel.

Choose alpha in the shown dialog.
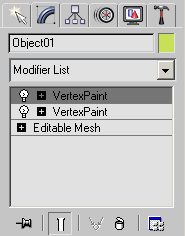
Each channel must have own modifier.

Export the mesh.
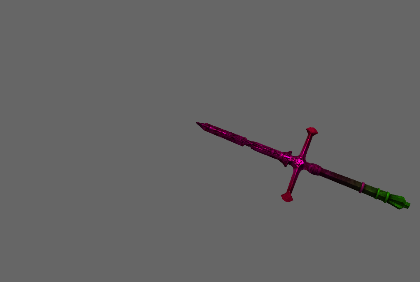
See in Editor.
After import you may open the VertexPaint modifier to see vertex color
and alpha channel.
Now about export.
Open the VertexPaint modifier.
Leave the closed lock not to get confused later.
After you painted vertexes in the VertexPaint modifier, open Export MSH.
You must use texture shaders with "vertexcolors" words that vertex color will be displayed.
In this case I use standardvertexcolorstatic.ssh.
Don't forget to check the Vertex Color checkbox.
So it looks in Editor.
To paint the alpha channel create new channel.
Choose alpha in the shown dialog.
Each channel must have own modifier.
Export the mesh.
See in Editor.
Spoiler for Hiden:
At first, import the model of your hero.
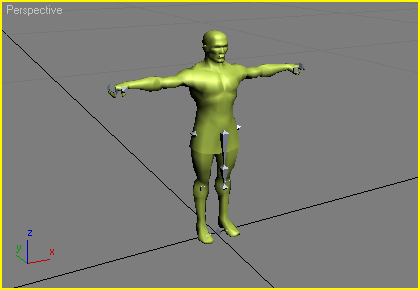
We need it to try on our armor, but first of all we need its bones.
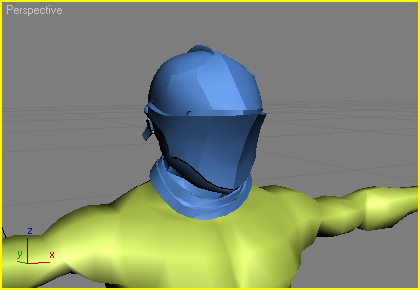
When your armor is completed add the skin modifier.
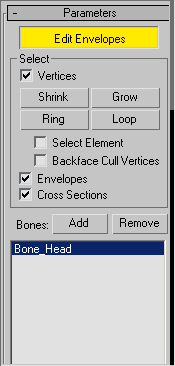
Then add bones that must have vertices of the armor and set their weights.
All is ready for export. Here do all in same way as in the first tutorial.
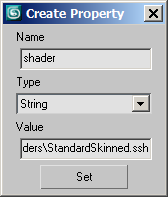
But shader must have word "Skinned".
It's necessary because the mesh won't displayed if the mesh has the skin modifier and the shader don't support the skinned meshes.
And on the contrary it's impossible to use the shaders support the skinned meshes with the mesh has not the skin modifier.
In this case it's StandardSkinned.ssh
It's all. Click on the Export button.

We need it to try on our armor, but first of all we need its bones.
When your armor is completed add the skin modifier.
Then add bones that must have vertices of the armor and set their weights.
All is ready for export. Here do all in same way as in the first tutorial.
But shader must have word "Skinned".
It's necessary because the mesh won't displayed if the mesh has the skin modifier and the shader don't support the skinned meshes.
And on the contrary it's impossible to use the shaders support the skinned meshes with the mesh has not the skin modifier.
In this case it's StandardSkinned.ssh
It's all. Click on the Export button.
Spoiler for Hiden:
Choose some mesh, open the script and..
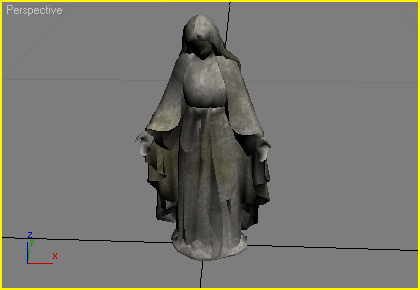
..do just as in the first tutorial.
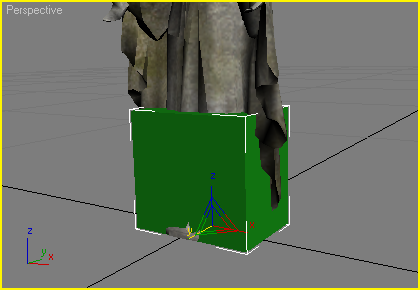
To create an impassable area choose Hit Boxes in the drop-down list and add some mesh.
It may be the object directly but only its border box are exported.

Or create a box yourself. Don't forget to convert to Editable Mesh.
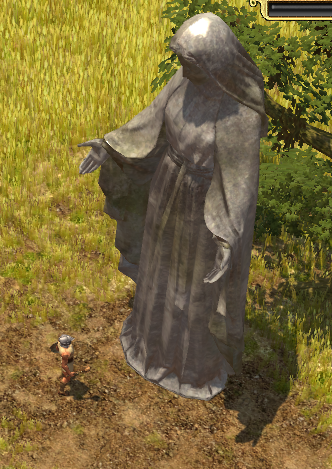
..do just as in the first tutorial.
To create an impassable area choose Hit Boxes in the drop-down list and add some mesh.
It may be the object directly but only its border box are exported.
Or create a box yourself. Don't forget to convert to Editable Mesh.
Spoiler for Hiden:
If you create some building then you may need impassable and passable areas of any form.
Create a low poly mesh.
In the first rollout choose Collision Mesh in the drop-down list and add this mesh.
Double click it in the listbox to show its options.
If you added the imported mesh in the list, you can click the Show button to see its passable faces.
Select your low poly mesh, open the Modify Panel, Faces Sub-Object level and select faces that will be passable, then click the Set button.
You can export.
Spoiler for Hiden:
Many buildings link with the map. For this purpose there are the Ground points.
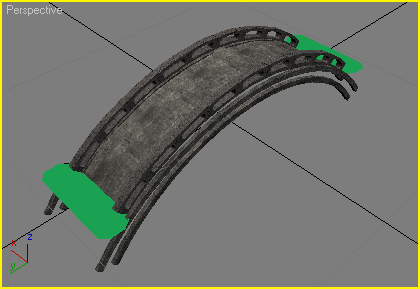
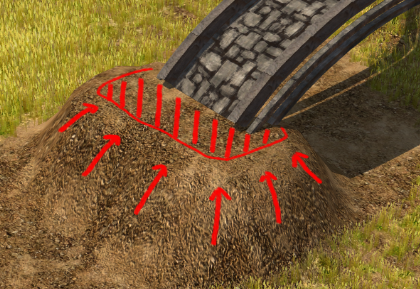
But sometimes it's necessary, that there was some area is between the mesh and the map plane. Especially if the mesh has not right borders.
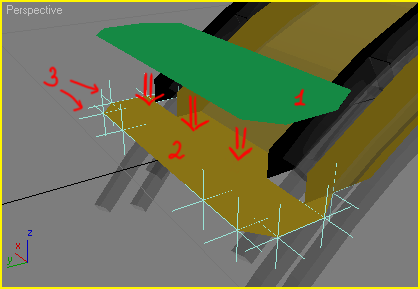
This area (1) is simple mesh that is imposed on the collision mesh (2) and links the basic mesh and the ground points (3).
It's logical to begin from the collision mesh.
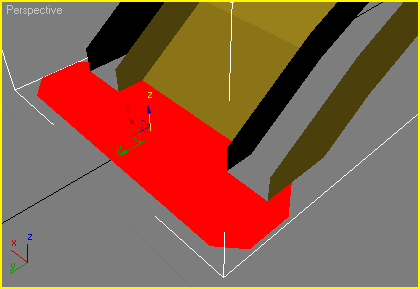
To exclude cracks between the mesh and the ground area detach some faces from the collision mesh for it. Then edit this plane, if it's necessary.
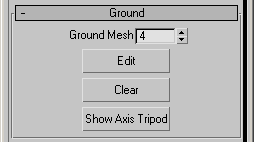
Add this mesh in the Meshes listbox as other meshes then in the Ground rollout set the number of this mesh in the list.
Also create a new texture for this mesh and in the shader property write TileBlendingStatic.ssh
Now transparent texture vertices will have a map texture. It's not necessary to create a new texture file for this purpose, a small transparent part can be created in the basic texture as it was done by creators.
The ground mesh is not obligatory. Let's come back directly to the ground points.

Click the Edit button in the Ground rollout.
It's recommended to place ground points on vertices of the ground mesh or the collision mesh.
To create new ground points select some mesh and go to the Modify Panel, Vertices Sub-Object, then select some vertex and click the Add button in the earlier shown window.
Ground points should be located in a counter-clockwise direction and not more than in 2-units steps between each other.
For ease of sorting, a click of the ground point in the list selects this point.
The Add button adds the ground point to the current item of the list.
Also there are the Up and Down buttons for this purpose.
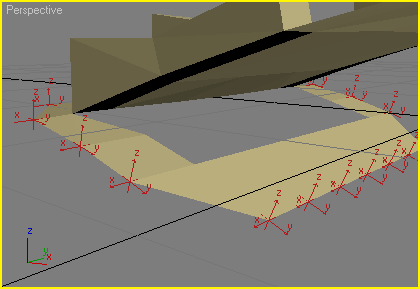
(another bridge is on this picture)
And remember that ground points must be normal(perpendicular) to the map plane.
For ease, there is the Show Axis Tripod button in the Ground rollout, a click of it shows axises of all points on the scene. The Z axis is the normal.

Sometimes it's necessary to create several not connected with one another groups of the ground points.
Ground points are sorted by colour therefore create a new point and set another colour to add a new group. To show the new group reset the Edit window.

But sometimes it's necessary, that there was some area is between the mesh and the map plane. Especially if the mesh has not right borders.
This area (1) is simple mesh that is imposed on the collision mesh (2) and links the basic mesh and the ground points (3).
It's logical to begin from the collision mesh.
To exclude cracks between the mesh and the ground area detach some faces from the collision mesh for it. Then edit this plane, if it's necessary.
Add this mesh in the Meshes listbox as other meshes then in the Ground rollout set the number of this mesh in the list.
Also create a new texture for this mesh and in the shader property write TileBlendingStatic.ssh
Now transparent texture vertices will have a map texture. It's not necessary to create a new texture file for this purpose, a small transparent part can be created in the basic texture as it was done by creators.
The ground mesh is not obligatory. Let's come back directly to the ground points.
Click the Edit button in the Ground rollout.
It's recommended to place ground points on vertices of the ground mesh or the collision mesh.
To create new ground points select some mesh and go to the Modify Panel, Vertices Sub-Object, then select some vertex and click the Add button in the earlier shown window.
Ground points should be located in a counter-clockwise direction and not more than in 2-units steps between each other.
For ease of sorting, a click of the ground point in the list selects this point.
The Add button adds the ground point to the current item of the list.
Also there are the Up and Down buttons for this purpose.
(another bridge is on this picture)
And remember that ground points must be normal(perpendicular) to the map plane.
For ease, there is the Show Axis Tripod button in the Ground rollout, a click of it shows axises of all points on the scene. The Z axis is the normal.
Sometimes it's necessary to create several not connected with one another groups of the ground points.
Ground points are sorted by colour therefore create a new point and set another colour to add a new group. To show the new group reset the Edit window.
Spoiler for Hiden:
Create any plane, don't forget to convert to Editable Mesh. It will be the portal directly.
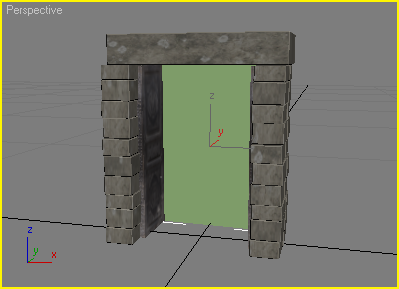
Faces of plane should look at the hero, which will enter to it.

Add this mesh in the Portals list.

Now create a dummy with name "ChokePoint", that is necessary to set orientation of portal. In other words, it's connection dot of two portals.
The Z axis of the dummy should be directed as portal faces. The dummy usually is on the plane of portal in center of bottom side.

Add the dummy in the Dummies list and export.

The portal is ready for use.
Faces of plane should look at the hero, which will enter to it.
Add this mesh in the Portals list.
Now create a dummy with name "ChokePoint", that is necessary to set orientation of portal. In other words, it's connection dot of two portals.
The Z axis of the dummy should be directed as portal faces. The dummy usually is on the plane of portal in center of bottom side.
Add the dummy in the Dummies list and export.
The portal is ready for use.